

Outcome
Follow the complete Movetrics Studio workflow from connecting F1-3D hardware through setup, measurement, review, report generation, and saving a reviewed result.
Applies to
Movetrics Studio is the Windows application supplied for use with Movetrics F1-3D force plates and the Movetrics FDT (Force Data Terminal).
This guide explains the interface and operator workflow. It does not validate calculations, reference ranges, protocol definitions, AI-generated conclusions, or clinical meaning.
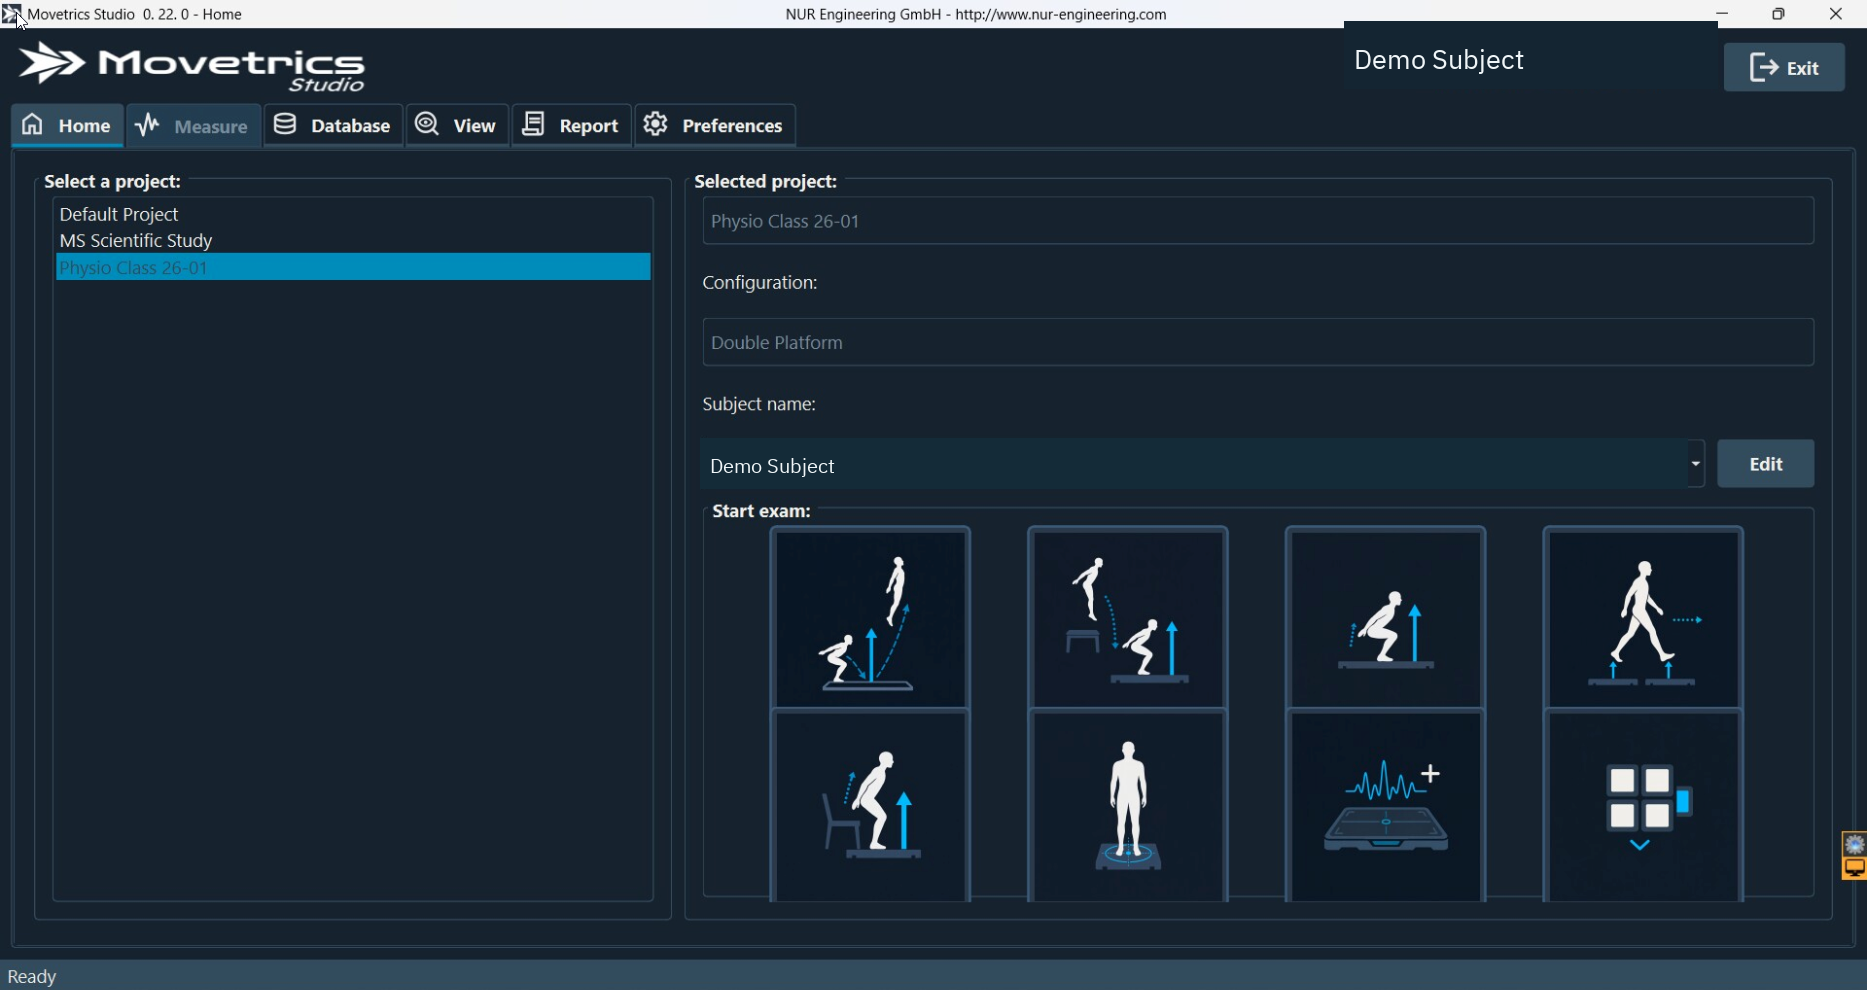
The application has six main tabs:
- Home — select the project, force-plate configuration, Subject, and examination.
- Measure — follow a structured wizard or view live signals and recording controls.
- Database — manage projects, configurations, layouts, and Subject records.
- View — open a saved examination, play it back, inspect values, and add notes.
- Report — review and save a report that has finished generating.
- Preferences — use permitted interface options and find installed-version information.
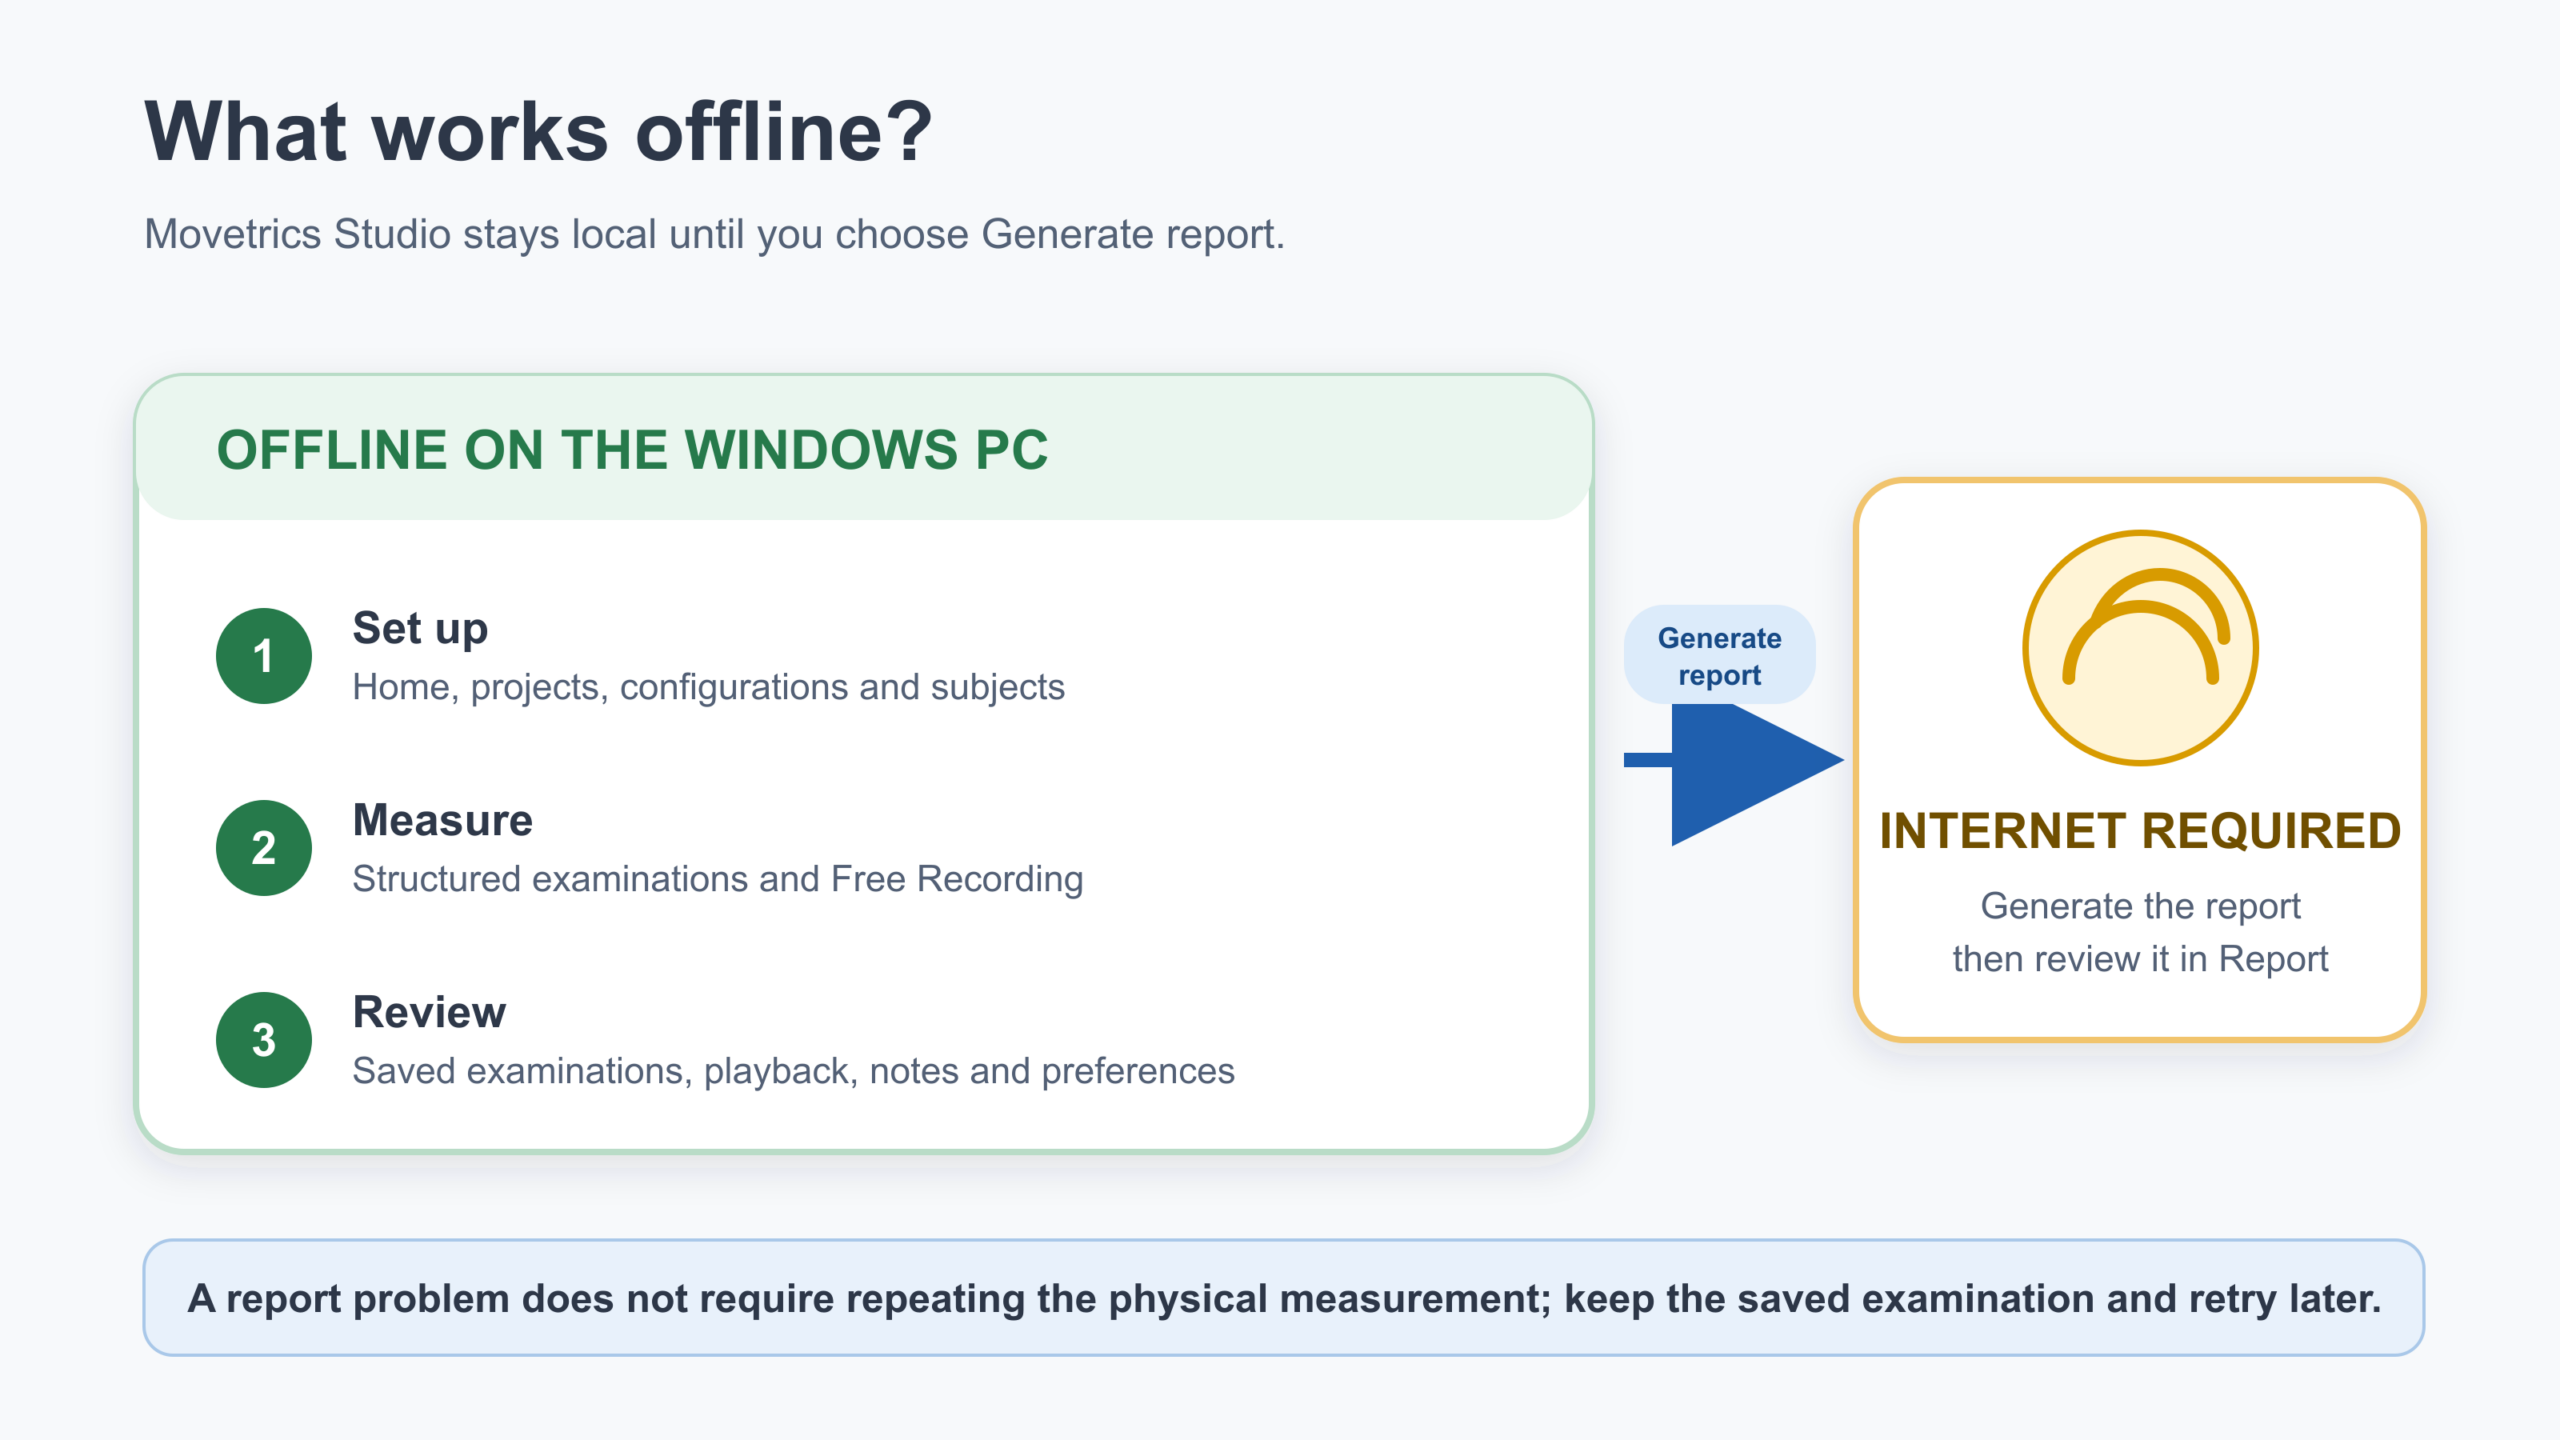
Home, Database, Measure, View, and Preferences are documented as working offline. Only report generation requires an internet connection. The exact remote report-service transfer, hosting, storage, retention, and deletion behaviour is outside the verified scope of this guide.
Before you begin
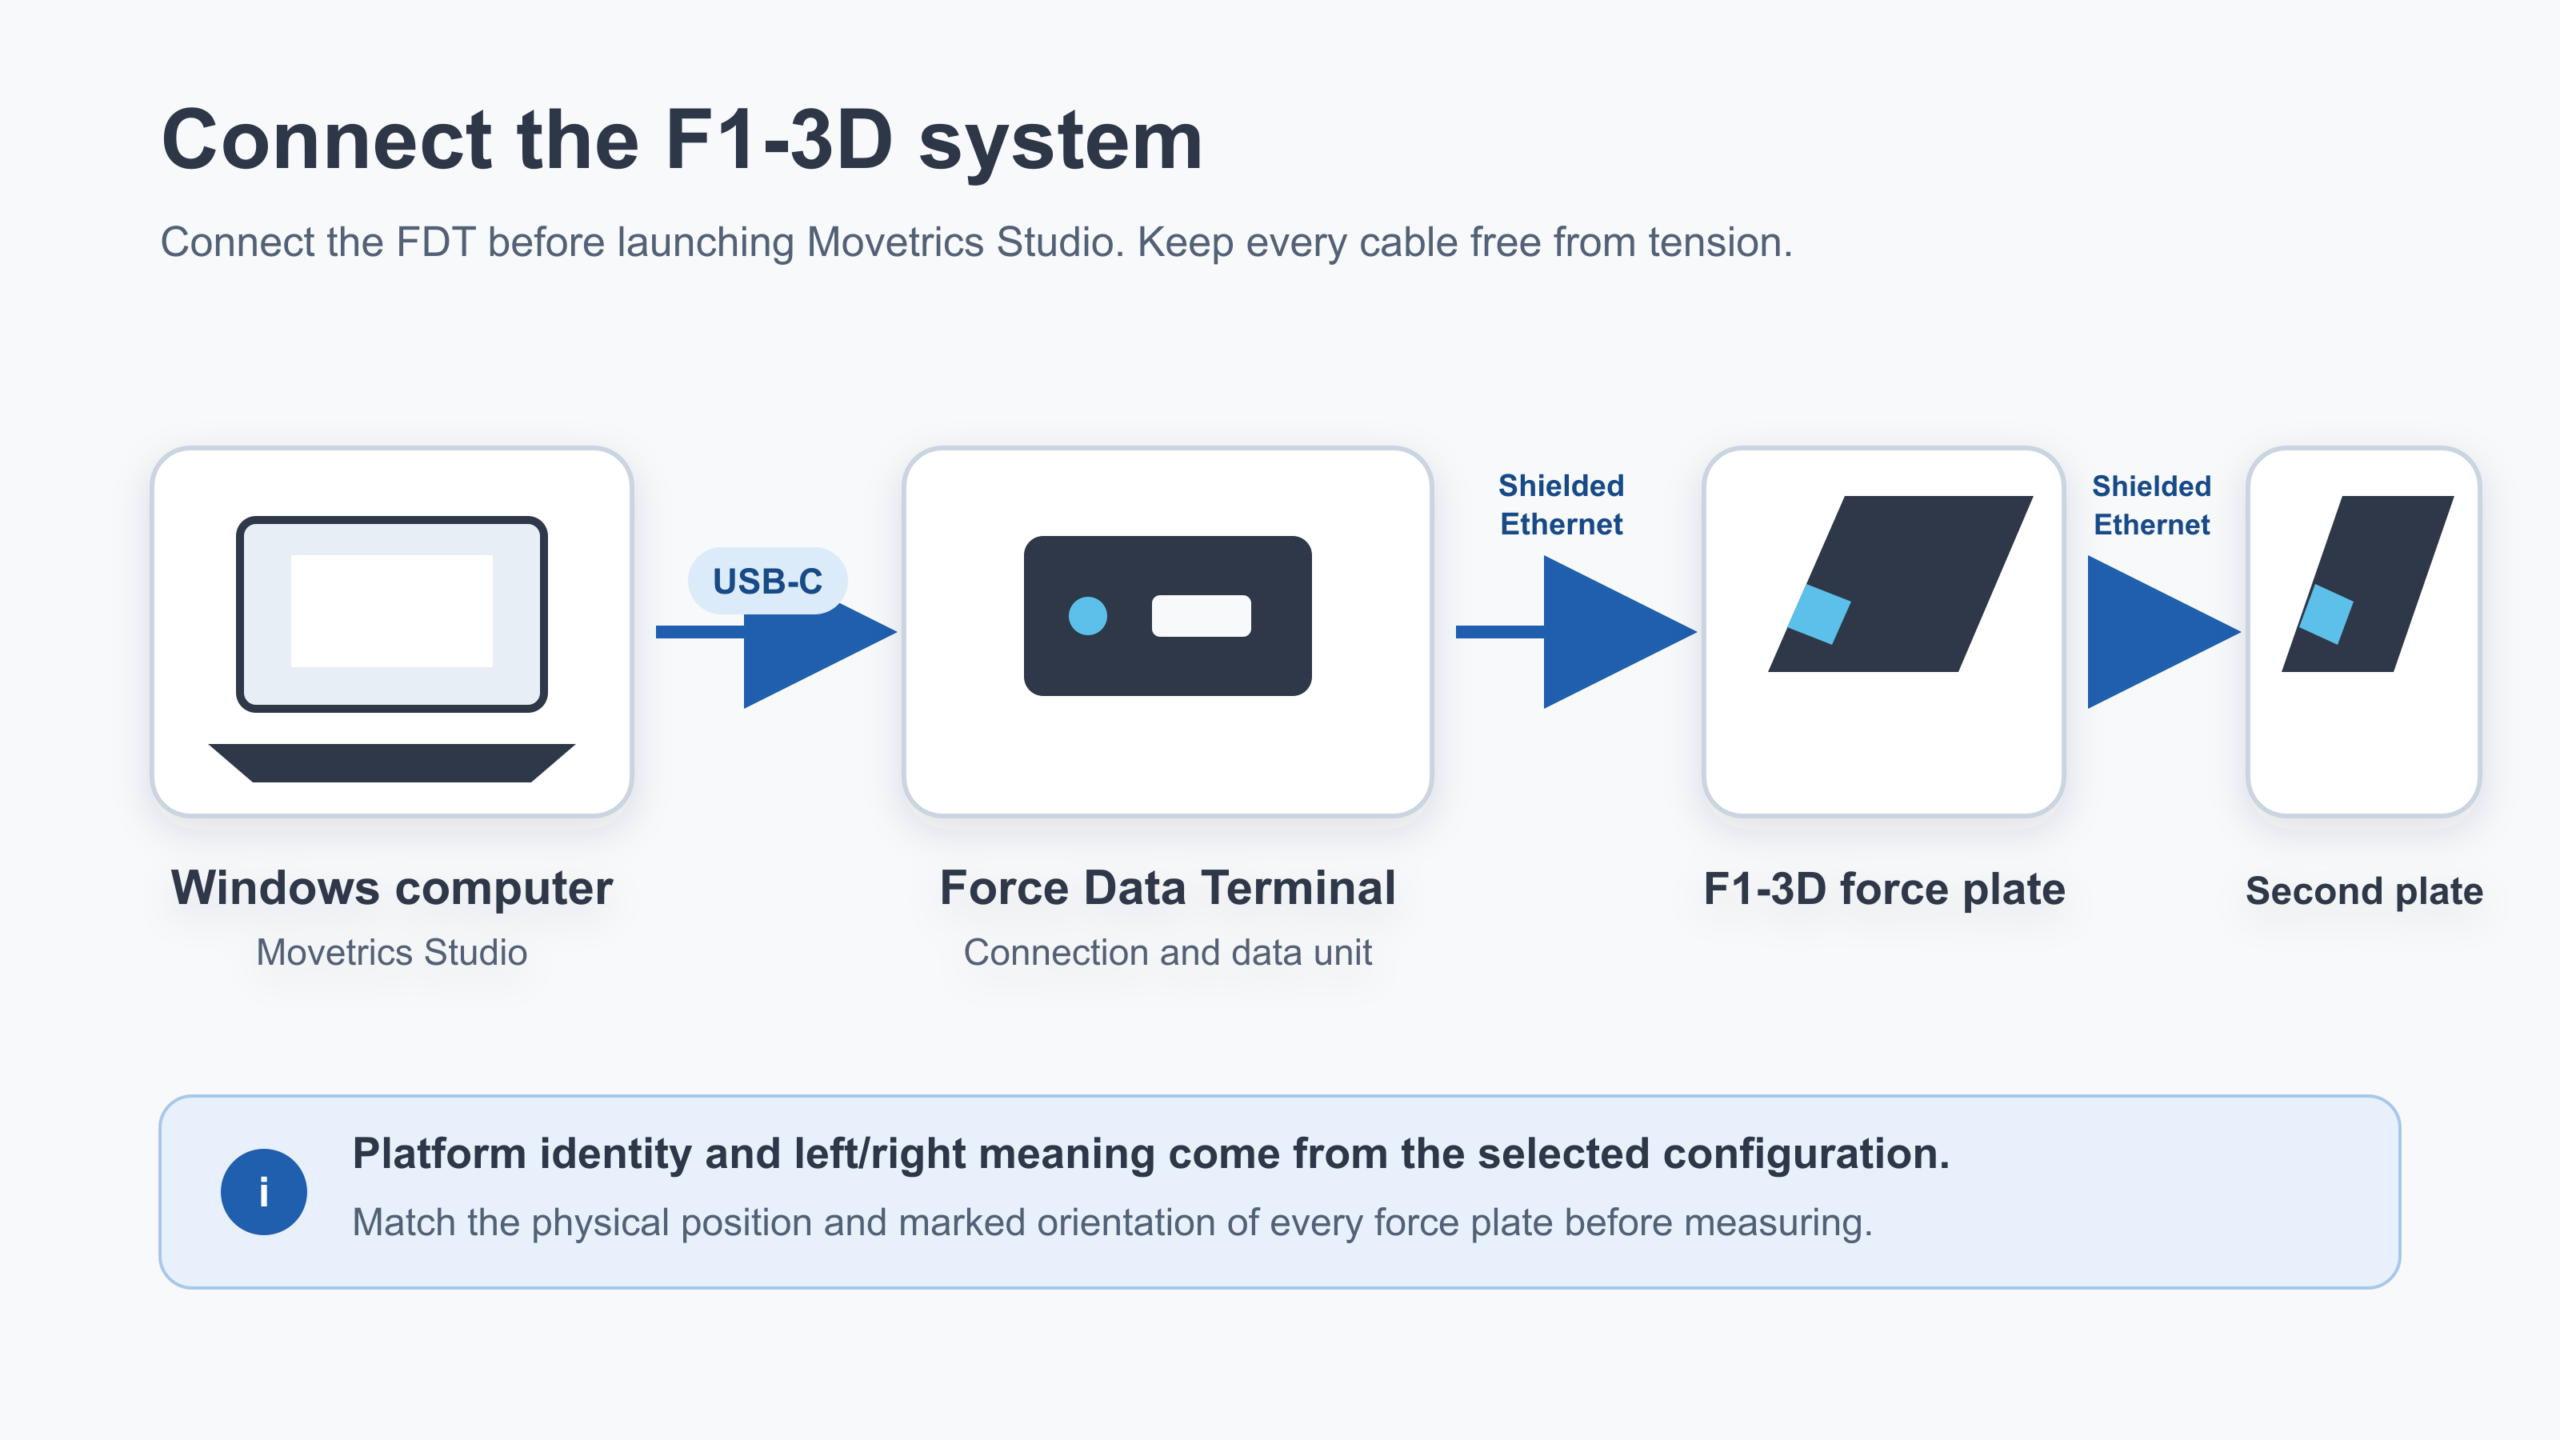
- Connect the F1-3D plate to the FDT with a standard shielded Ethernet cable.
- Connect the FDT to the Windows PC with one USB-C cable.
- Connect the FDT before launching Movetrics Studio.
- Place the force plates in the approved arrangement and keep them unloaded until the software prompts otherwise.
- Know which project, Subject, force-plate configuration, and examination you intend to use.
- Follow your organisation’s rules for access, consent, naming, storage, retention, and sharing of personal and measurement data.
- Use only an approved configuration. Do not change calibration or service settings as part of normal operation.
Steps
1. Connect and launch
- Check that the shielded Ethernet connection between F1-3D and the FDT is secure.
- Connect the FDT to the Windows PC with its single USB-C cable.
- Launch Movetrics Studio.
- Wait for the initial countdown and the live Free Recording view to appear.
- If you want to run a structured examination, select Home.
2. Understand Home
- On Home, select the intended project.
- Confirm the linked force-plate configuration.
- Select the intended Subject.
- Choose an examination tile. The visible interface includes Countermovement Jump, Drop Jump, Squat Jump, Gait, Sit-to-Stand, Static/Balance, and Free Recording. The available set may differ in another installed build.
- Before selecting a structured examination, verify all three context selections again. These selections determine where the saved examination belongs and which layout is used.
3. Create or check database records
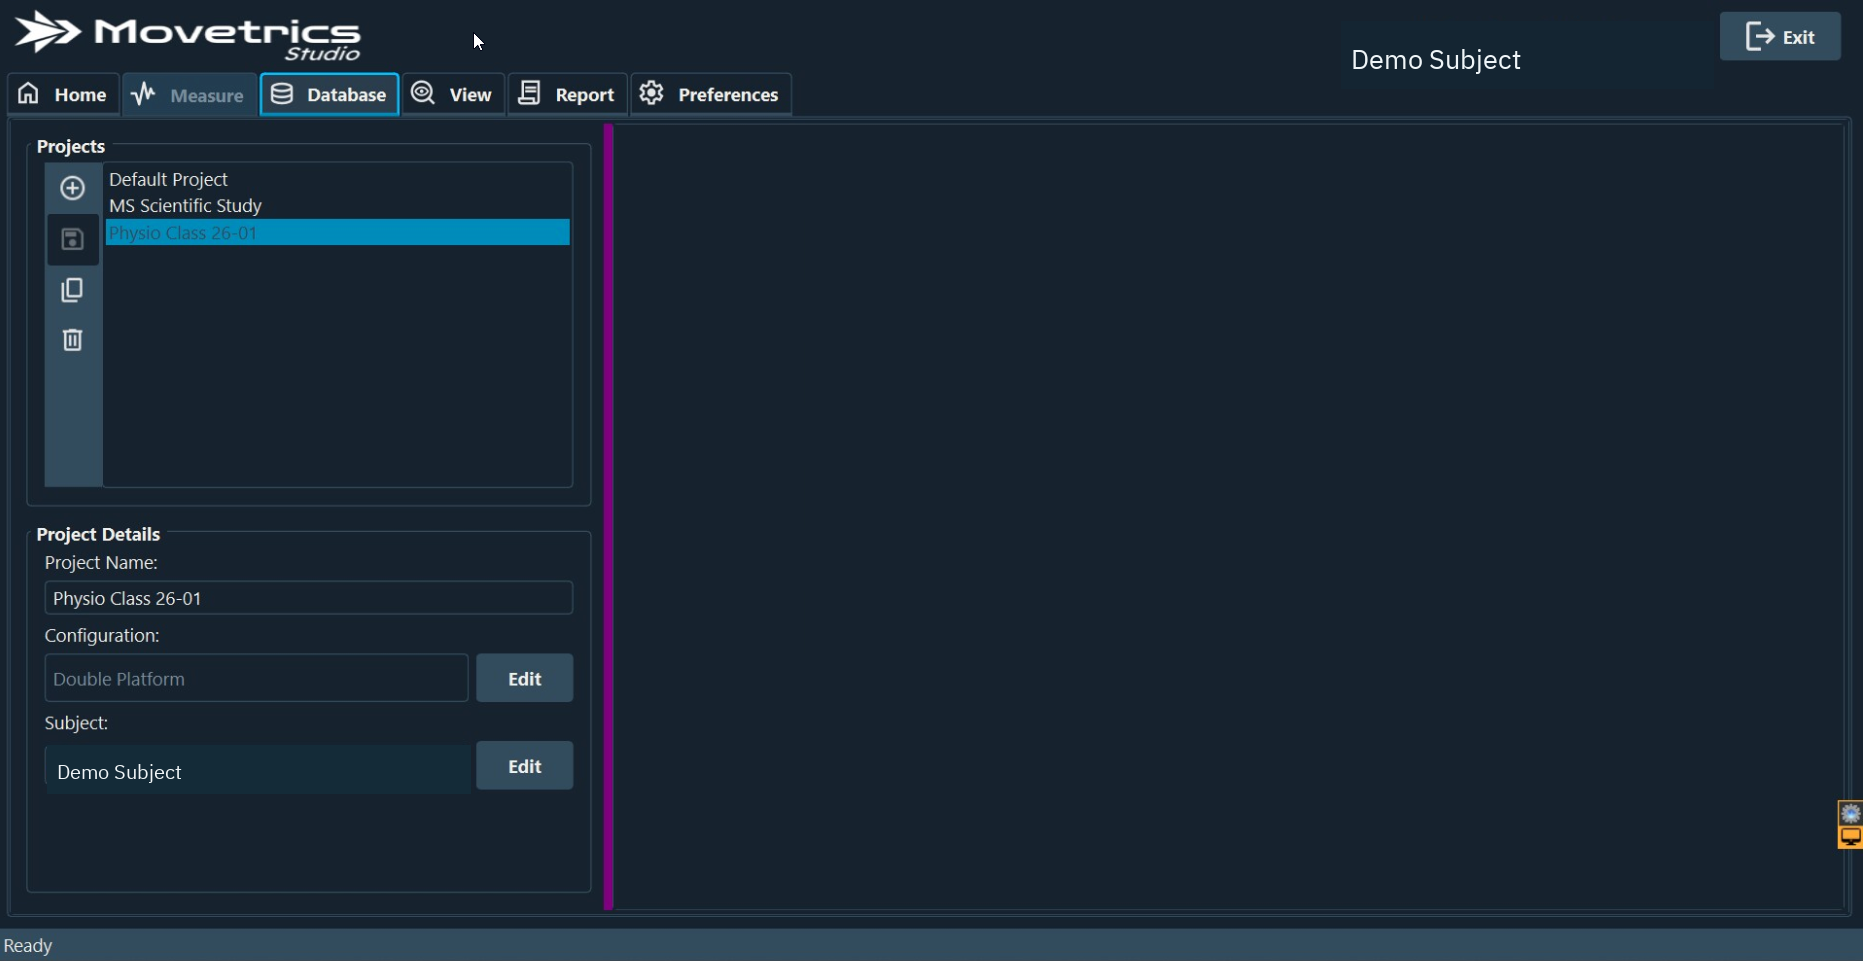
- Open Database when the required project or Subject is missing, or when the plate layout needs to be checked.
- Create a project only when an authorised project record does not already exist.
- Open the configuration list and select the approved saved layout.
- Compare its platform numbers, positions, and orientation with the physical arrangement. Platform numbers do not have a universal left/right meaning; the saved configuration defines their relationship.
- Search for the Subject before creating another record. Enter only information required for the approved purpose.
- Link the correct configuration and Subject to the project where the interface provides that relationship.
- Return to Home and confirm the selections.
The configuration editor also exposes a calibration window. This is an administrator-controlled interface, not a routine operator step. This public guide intentionally does not provide an engineering calibration procedure.
4. Run a structured examination
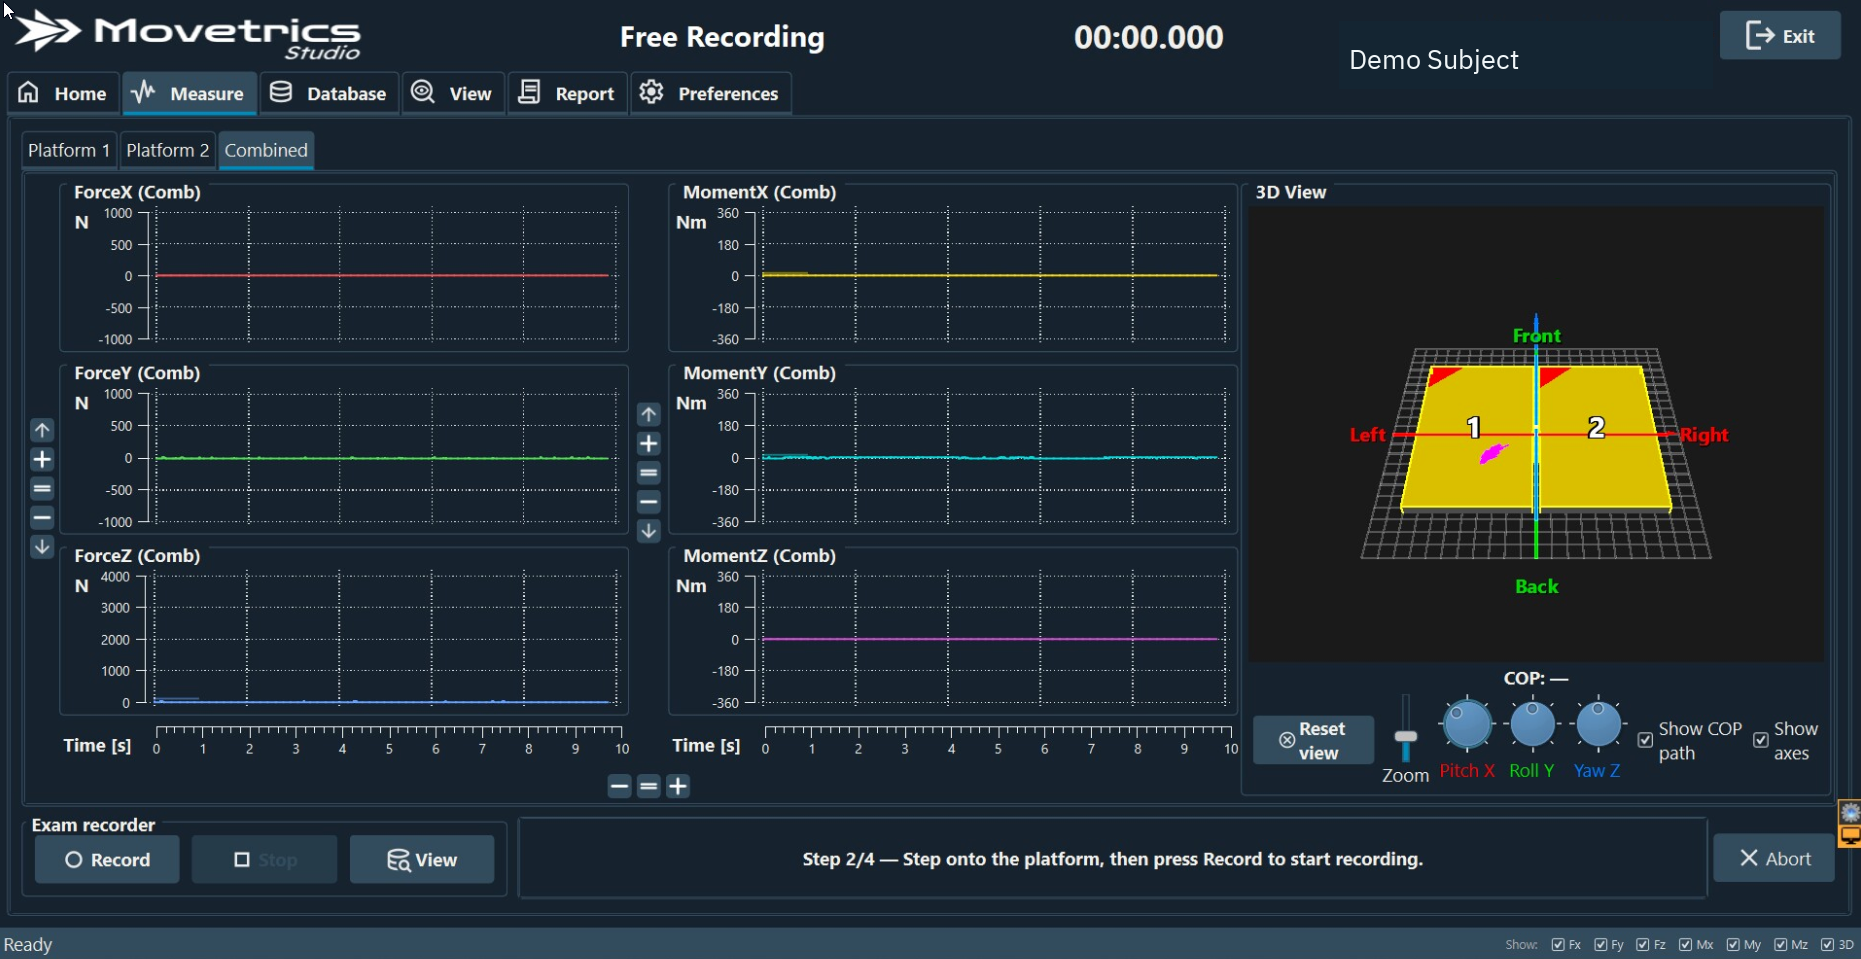
- Select the required examination tile on Home.
- Movetrics Studio opens Measure and starts the guided workflow.
- Read and follow each current on-screen prompt. Audio guidance may also be present.
- During tare, keep every force plate unloaded and untouched.
- Ask the person to step on, stand still, move, wait, or step off only when the current prompt requests it.
- Observe the live signals without using their appearance as a substitute for protocol or calculation validation.
- Complete the task and wait for the software to finish and save the examination.
The exact sequence depends on the selected examination. This guide does not replace the approved task-specific protocol.
5. Use Free Recording when a structured examination does not apply
- Select Free Recording on Home, or use the live view shown after application startup.
- Define the task, setup, cue, start event, stop event, and repeat criteria before recording.
- Select Platform 1, Platform 2, or Combined as needed for viewing.
- Show or hide Fx, Fy, Fz, Mx, My, Mz, 3D, or COP display elements to make the relevant signals visible.
- Use zoom and reset controls to inspect the display. These view controls do not establish whether a trial is valid.
- Start recording only when the setup is ready, and stop it at the defined end event.
- Save enough context in the examination notes for another reviewer to understand what was recorded.
6. Review the saved examination
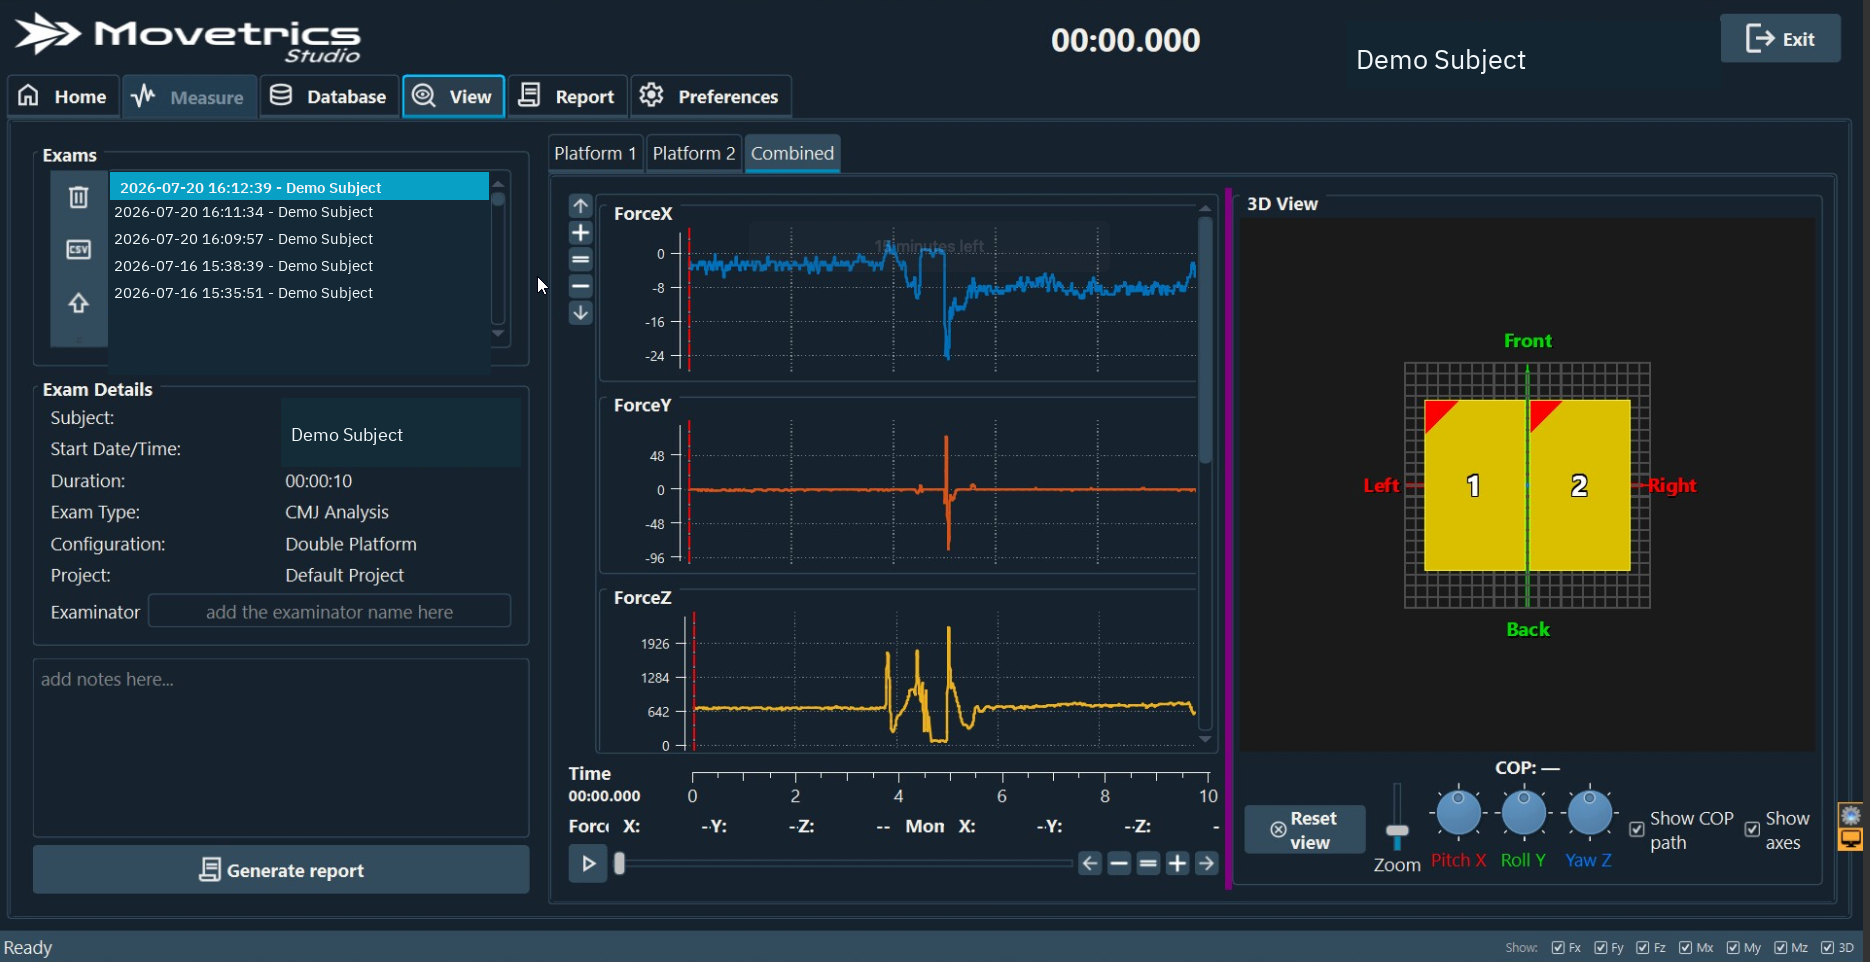
- Open View. The most recent saved examination may open automatically.
- Confirm its project, Subject, examination type, date and time, duration, and configuration.
- Add or confirm the examiner and enter concise factual notes.
- Use play and pause, the time slider, zoom, and reset to inspect the recording.
- Select Combined or an individual platform to inspect the visible channels.
- Read exact values only at the currently selected time position.
- Record any deviation, interruption, assistance, unexpected contact, or reason to repeat the task.
- Do not generate or share a report until a qualified reviewer considers the saved examination suitable for the intended use.
7. Generate the report
- Keep the saved examination selected in View.
- Connect the Windows PC to the internet.
- Select Generate report.
- Wait while Movetrics Studio shows the report-generation state. The interface can be unavailable during this operation.
- When generation finishes, Movetrics Studio opens Report.
- If generation fails, keep the saved examination, restore connectivity, and retry from View. A report-service problem does not require repeating the physical measurement.
8. Review and save the report
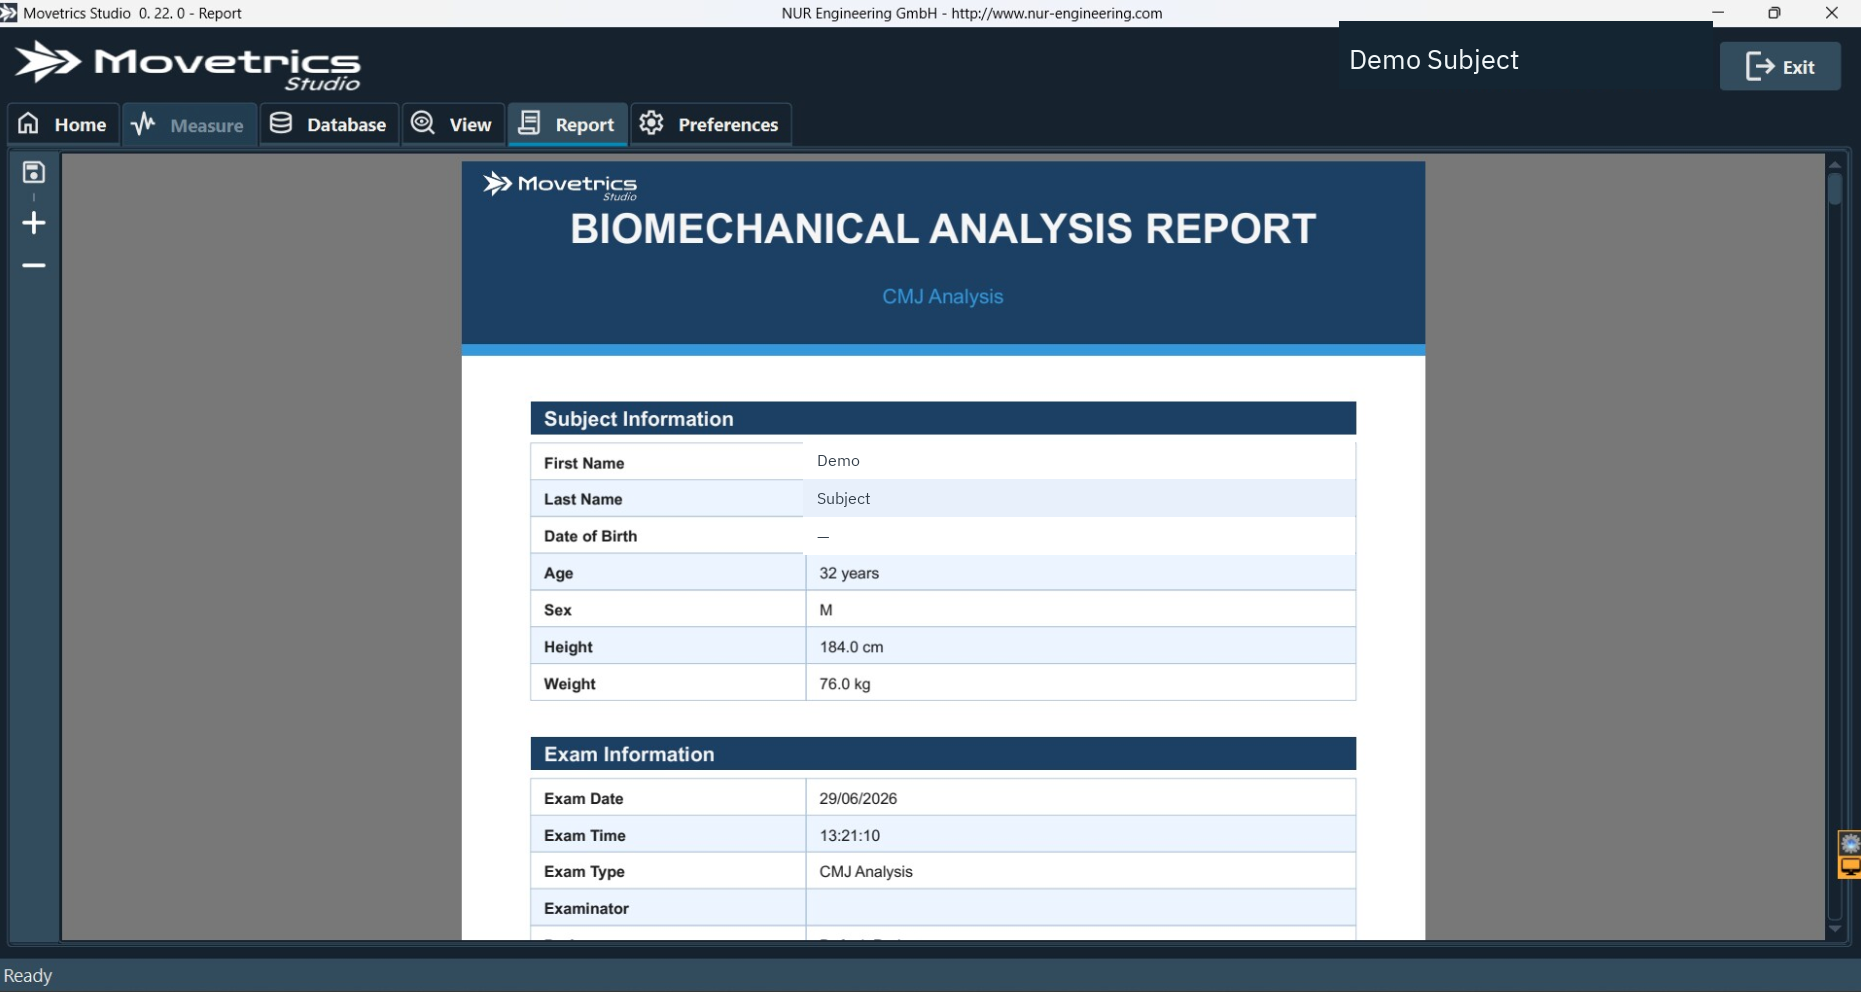
- Confirm that the Subject and examination context match the saved examination.
- Review the glossary, metric names, values, units, tables, graph titles, axes, legends, platform labels, COP views, and phase labels that are present.
- Treat all displayed calculations and ranges as software output. This guide does not independently validate them.
- Read AI-assisted narrative last. Check every statement against the measured values, graphs, selected configuration, task notes, and approved interpretation rules.
- Remove or do not use text that is incorrect, unsupported, medical, deterministic, or inappropriate for the context.
- Save the PDF to an approved location using the report save control.
- Apply your organisation’s access, retention, and sharing rules before distributing it.
9. Use Preferences conservatively
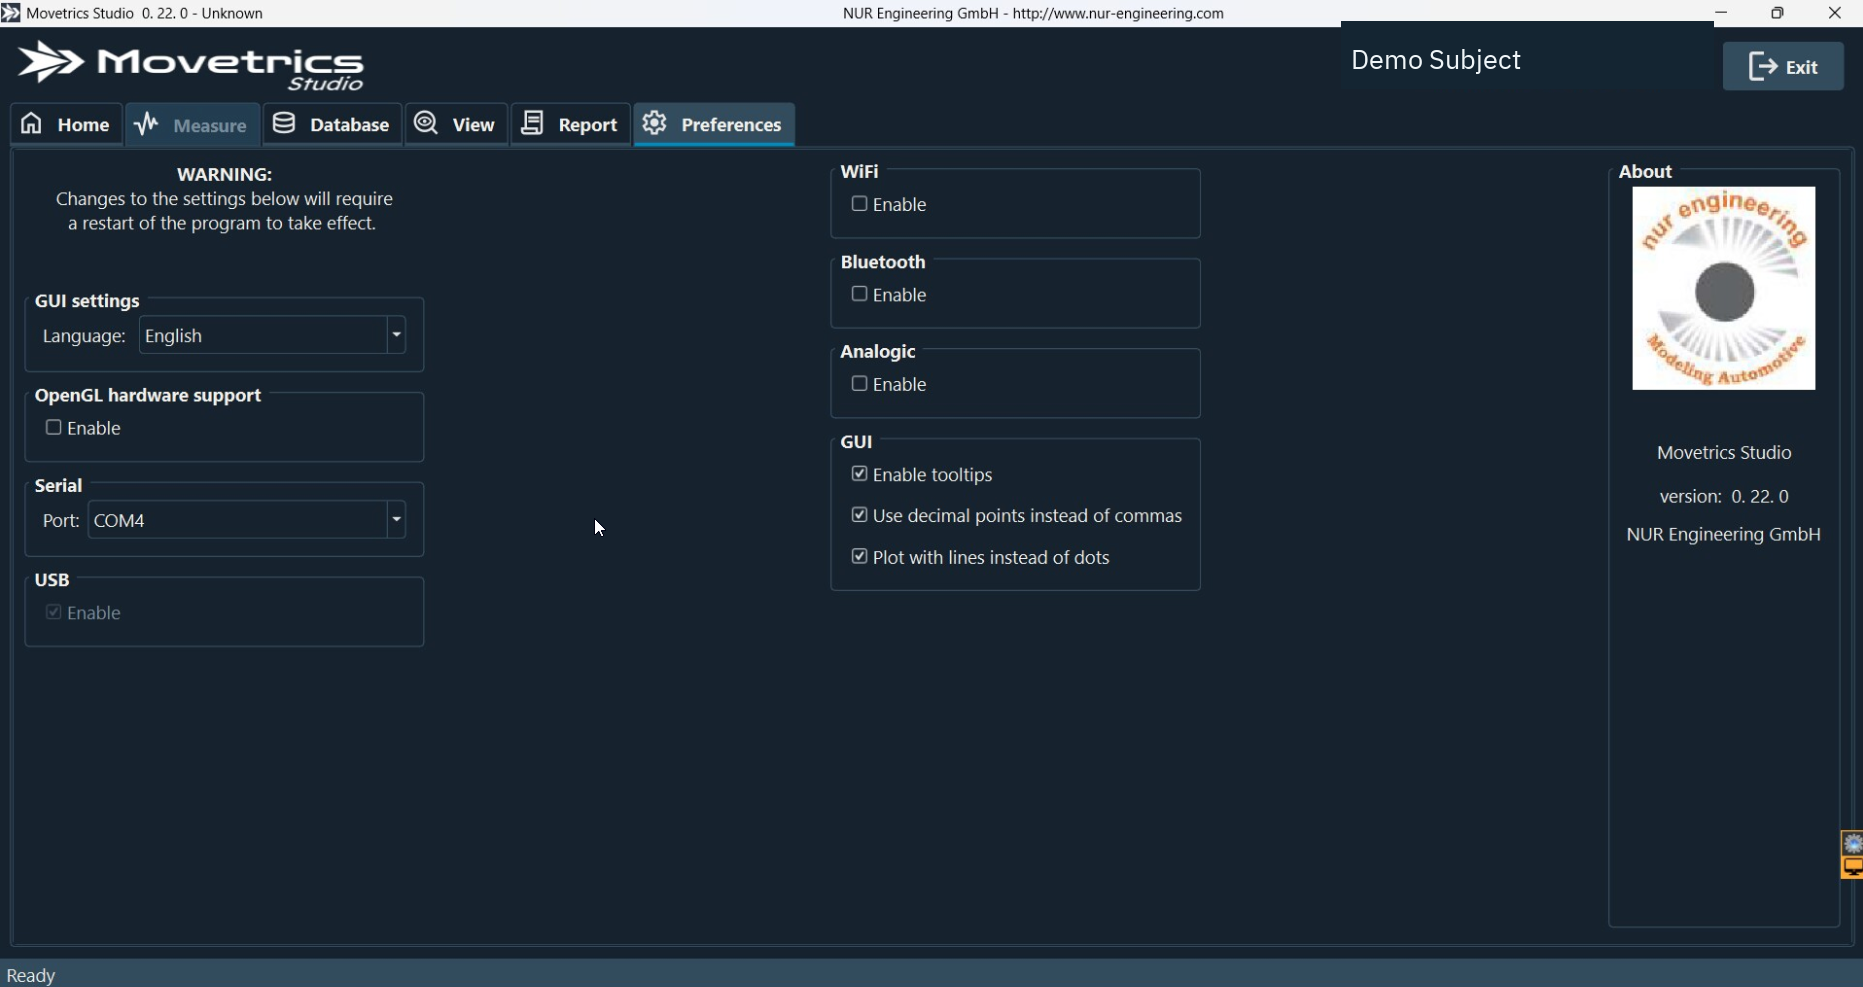
- Open Preferences only when no measurement or report operation is active.
- Use normal interface options only when their effect is understood and permitted, such as tooltips, decimal display, or plot appearance.
- Use About to record the installed Movetrics Studio version when requesting support.
- Do not change serial, USB, Wi-Fi, Bluetooth, analogue, controller, firmware, calibration, or service options without current authorisation and instructions.
- Restart Movetrics Studio if the interface explicitly says a permitted change requires it.
You should now see
- A connected F1-3D–FDT–Windows PC system with Movetrics Studio open.
- The intended project, configuration, Subject, and examination selected.
- A saved examination available in View, with the correct context and useful notes.
- When internet access is available and generation succeeds, a report open in Report and ready for human review and approved saving.
Stop or repeat when
- The physical plate arrangement does not match the selected configuration.
- The wrong project, Subject, or examination is selected.
- A plate is touched or loaded during tare.
- The person performs a different task from the current prompt or approved protocol.
- Recording is interrupted, contains unexpected contact, or cannot be identified confidently.
- A report’s context, table, graph, platform label, phase, or AI-assisted statement conflicts with the saved examination.
- The interface requests calibration, firmware, database migration, licensing, or another service-level action.
If it does not work
- Studio does not start as expected: confirm the FDT is connected to the Windows PC by USB-C before launch, close the application only when no operation is active, and reopen it.
- Signals are absent or unstable: stop before recording; check the approved physical connections, unloaded plates, cable tension, and selected configuration. Do not improvise calibration.
- The wizard does not advance: read the current prompt, restore the requested unloaded or stable condition, and use the task-specific troubleshooting guide.
- A saved examination appears under the wrong context: do not overwrite or share it. Preserve it and record the mismatch for review.
- The report does not generate: confirm internet connectivity, keep the examination saved, and retry from View after the current operation has ended.
- The report opens but looks inconsistent: do not rely on or share it. Preserve the saved examination, report, screenshots, installed version, and exact visible message for support.